

How to configure your Case Manager screens
P4W’s Case Manager screen provides a high degree of personal configurability to suit individual users’ preferences.
Over the years, I have seen some really “interesting” Case screen layouts with a shrunken Case History screen surrounded by over-sized, permanently open, additional Panes. Typically, the users were unaware of how the screen layout could be changed and were usually delighted with the new look after a few clicks of the mouse.
So, let’s have a look at how you might change your own view of Case Manager.
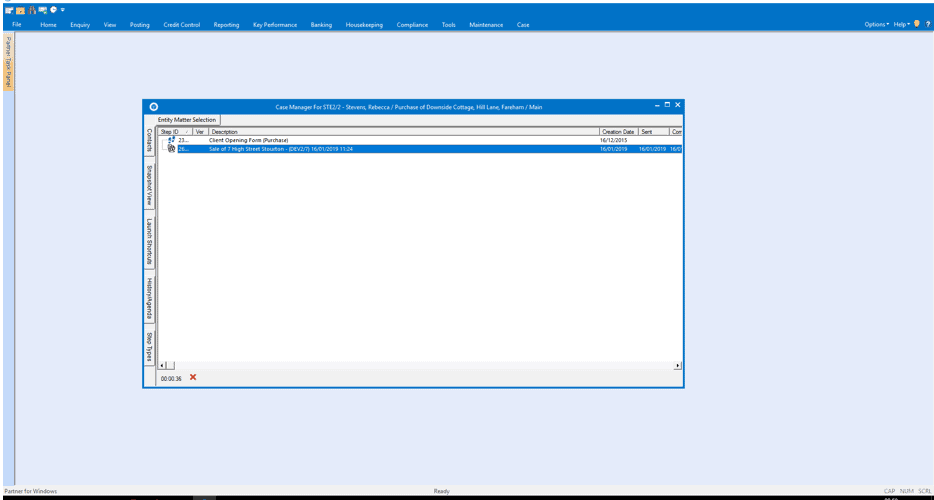
Depending on which Panes you have active, the initial view of the Case screen is presented as a set of multiple windows as below:
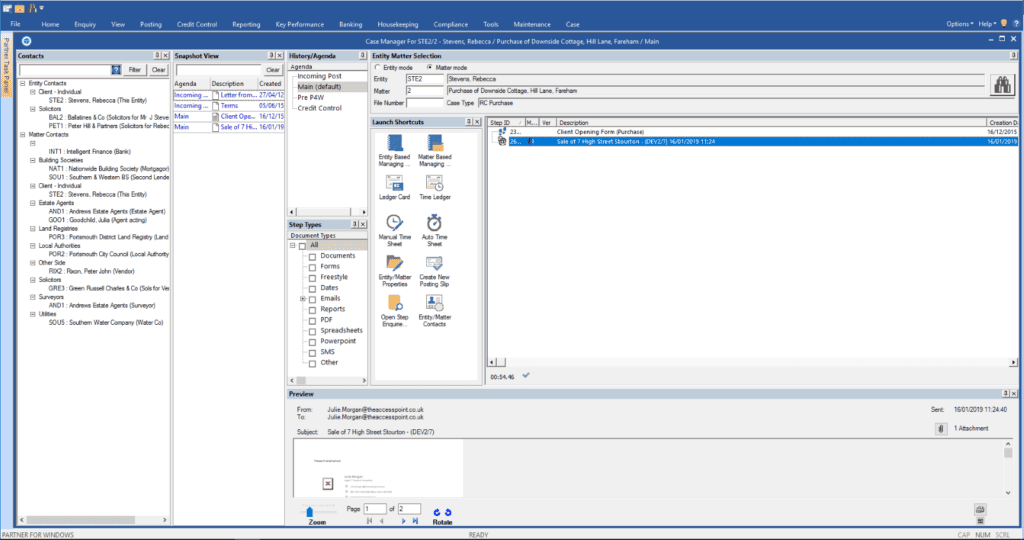
One of the objectives for the Case Manager screen is to provide the user with a view of all the key information about the case without the need to open further screens of information such as Contacts. The above screen shot shows the default view which provides all of the panes available in “open” format. Although it is not particularly apparent on the view above, this even includes the File Viewer pane at the foot of the screen which can be set to provide an auto-preview of any selected document in the central Case pane or on a second screen for those who use one.
In my own use of P4W, I’ve always found that the default view with open Panes looks cluttered whilst reducing the size of the most important screen: the Case History. Each of the active panes can be repositioned on the screen and or minimised using the pin symbol to provide a tab which can then be clicked on to temporarily reveal the information held in that pane. To move the location of a Case Pane, firstly it needs to be set to be always open via the pin. Drag the pane by pulling the title bar of the pane with the mouse and then; once in position, let go and the pane should then be anchored to its new location. Click on the pin again to minimise the Pane.
Hint!
When moving the pane, if you want it to be along the vertical edge (left or right) of the screen, make sure that it previews as a vertical outline before letting go of the mouse. If it is horizontal, it will anchor itself to the top of the Case screen.

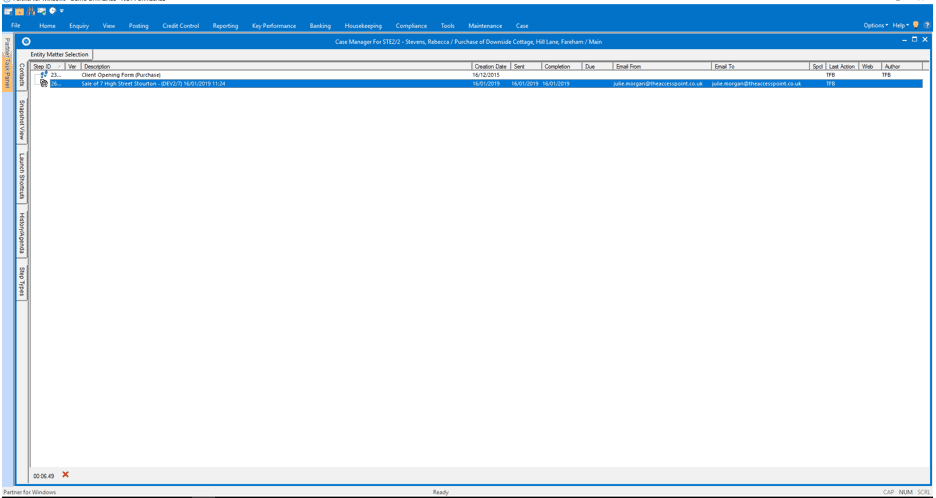
Once the user has selected a preferred view, this can be saved by accessing the Case toolbar at the top of the screen and selecting Panes\My Layout\Save Layout. This will then become the default view for that user whenever they access Case. The screen shot below shows an alternative; i.e. my preferred view, with all of the selected panes around the outside edge of the main case history screen:
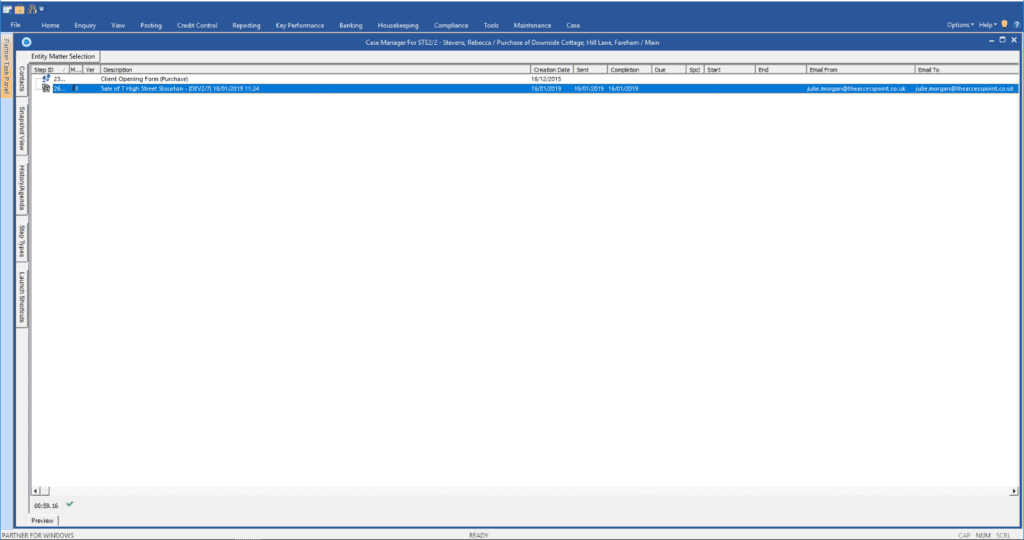
For users working on a single screen, the trick is to get the balance right between the amount of information shown to the user in the various panes versus the amount of screen space left for the core element of the case file; i.e. the chronology of items and actions carried out to date.
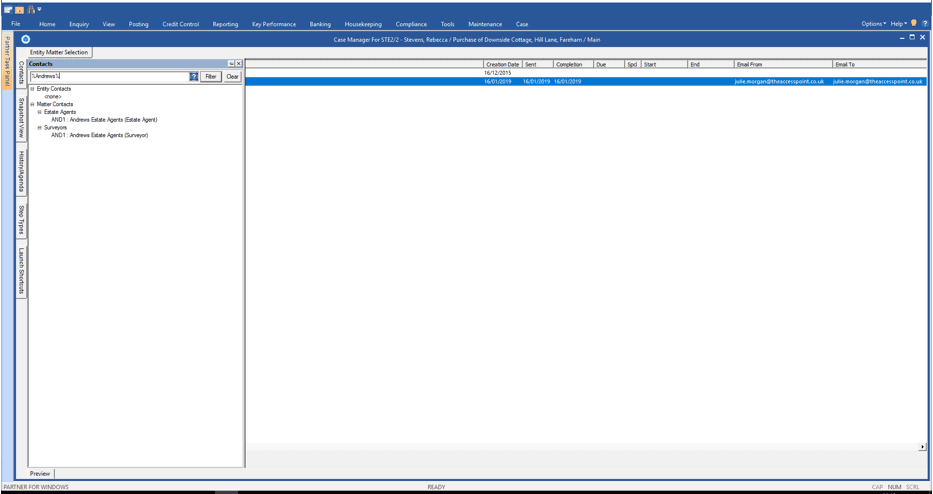
When a pane has been minimised, if the user wishes to view the data in the pane, then they simply hover over it with the mouse or click on the tab as below:
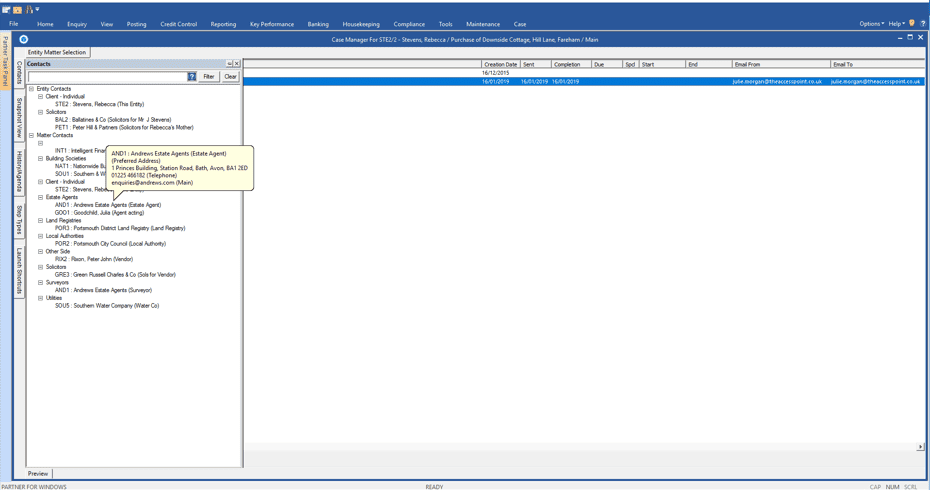
Here, we have clicked on the Contacts tab to reveal all of the Entity/Matter contacts associated with the case. By hovering over a contact, a display bubble revealing further details is shown as we can see with the Andrews Estate Agents example.
Right clicking on a selected contact reveals further options as below:
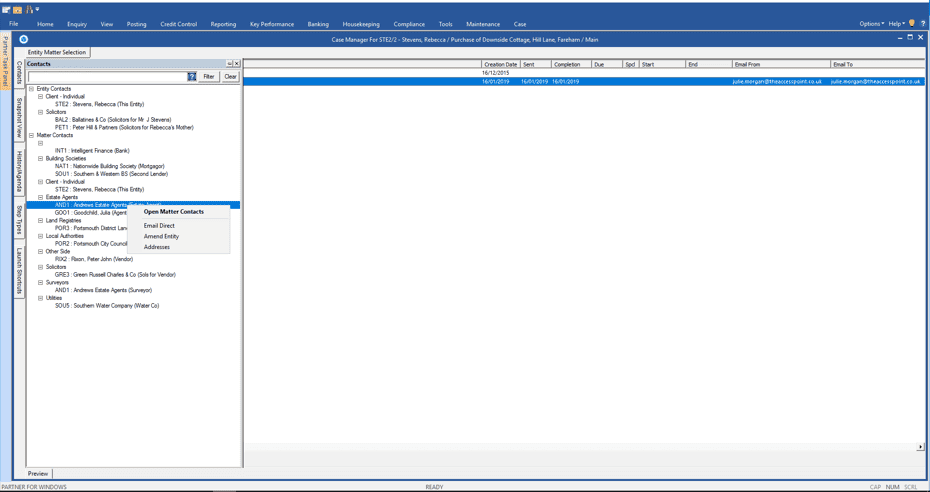
The right-click reveals functionality which has always been available on the standard view of contacts and, in fact, that view can be accessed either by selecting the “Open Matter (or Entity) Contacts” option or by double-clicking on any of the contacts displayed in this pane. You can also use a wildcard entry; e.g. %Andrews% or %Estate Agents% in the field at the top of the contacts screen in order to filter a lengthy contact list to find who you are looking for as below:
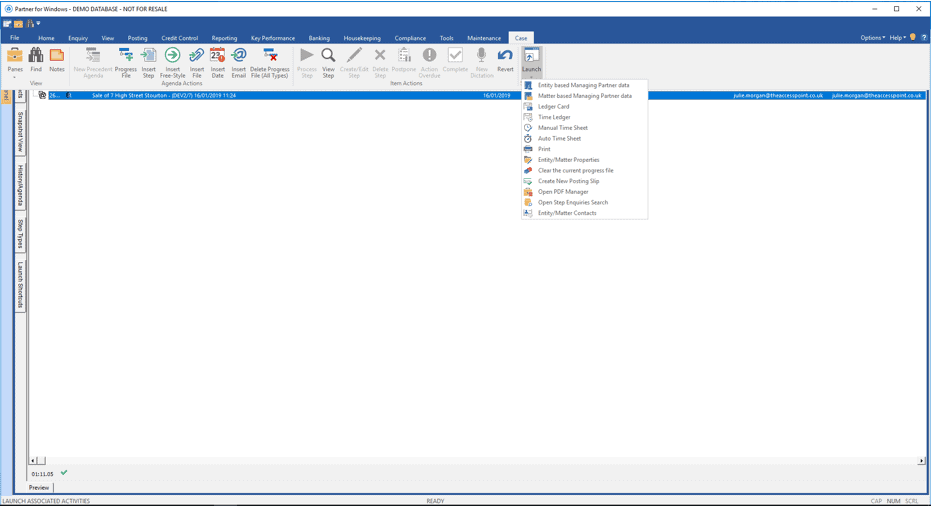
The Case function icons are accessible via the Case toolbar at the top of the screen. In addition, access to related information such as the Financial Ledger is also available via the Case toolbar using the Launch option as below or, as I have, you can access these via a Launch Shortcuts Case Pane.
Note:
Any of these can be added to the Quick Access Toolbar at the top of the screen via a right-click option on the highlighted function.
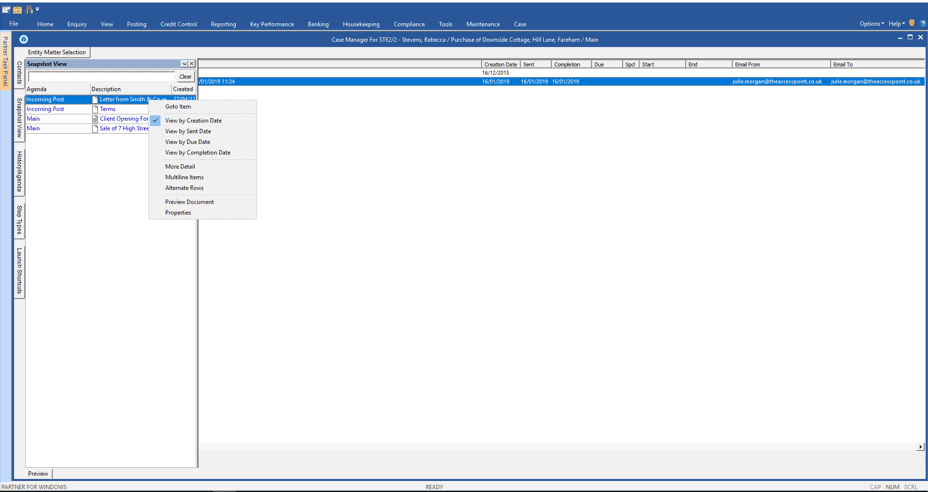
For those of you who use multiple Progress Files (aka Agendas or subfolders), don’t forget to use the invaluable “Snapshot History” pane which provides a searchable, chronological view of all items held in the case file. The Progress File location is listed for each item plus you can go directly to the item or review it using File Viewer via a right-click on a selected item.
Accessing Case Functions
Whilst Case functions are accessible from the toolbar, it is worth remembering the useful shortcut keys available to invoke Case functions; which means that the user can work from the main Case pane without having to go to the toolbar each time. These include Alt S to Insert a Step, Alt F to insert a Freestyle Step, Alt T to take a Step, and Alt C to Complete a Step.
Changing the Case History Screen
There are a number of options available to customise the main, working screen within Case Manager.
You can zoom in/zoom out (CTRL +/-) whilst viewing the case screen should you wish to increase or decrease the size of the displayed text. Once your preferred text size has been reached, if you exit the Case screen and open it again, the newly-selected text size should be retained. This should also be the case when you next login to P4W.
The order of items in the case history can be amended; either by using the Alt and the up or down arrows option to move the highlighted step up/down or holding down the ALT key and using the mouse to drag the item to the desired position.
It’s also possible to change the order of the columns visible on the Case History screen as well as remove those which are of no use to you; e.g. “Web” if you don’t use Legal Portal. This is done in Workstation Settings under “Case\Set-up” Column Control as per the screenshot below:
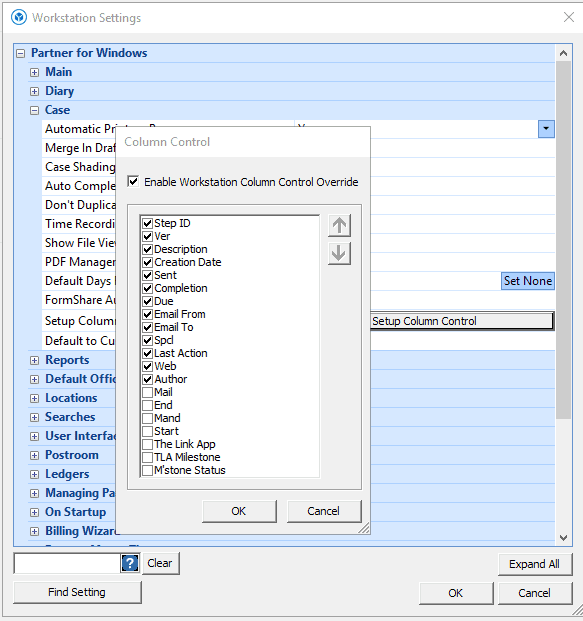
To reposition a column, highlight the column title on the list and use the up and down arrows to the right of the drop-down list. To remove or reinstate a column, simply untick or tick the box next to that column header. Note the “Enable Workstation Column Control Override” tick box at the top of the list and tick this to ensure that your selections take precedence over the firm-wide settings. Once you’ve made your changes, log out of P4W and then log back in to see the results. Being a Workstation setting, this will only affect your view of the Case History screen. This facility is also available in System Settings for applying across all users.
You can amend the width of each column by placing the mouse to the right of each column header box and dragging the margin to your preferred width. This enables a much larger width for accommodating the Description field; thus giving you the full detail for each item on first glance and saving further clicks. Once you’ve achieved the desired column widths, simply exit the Case screen and then open it again. Your new format should now be the default.
Finally, if your Case screen looks something like the example below:
Then simply drag it up to fit neatly into the top left-hand corner; just to the right of the Task Panel tab and under the Ribbon Bar, and then click on the bottom right-hand corner to drag it out to the bottom right of the screen to appear as the example below. Once you’re happy with the sizing and position, close the Case screen with the “X” at the top right and that will then save your new size and position as your default. Test it by opening another Case file. This applies to any of the major screens in P4W: e.g. Matter Ledger, Time Ledger, Managing Partner (Custom Fields), so if any of these need resizing, just follow the same instructions as with the Case Manager screen.
By reconfiguring the Case Manager screen to your desired settings, you should find it improves your user experience and increases your efficiency by reducing the need for further mouse clicks to get to the information needed.
I hope this has been useful in helping you to configure a Case screen that best suits your way of working.
Important!
Please do check with your P4W supervisor(s) before making any of the changes to the Case screen layout as outlined above; just to make sure that these are accessible to you and approved for use. For any P4W supervisors reading this, you can establish a practice-wide default Case Panes view for your users which will be the standard for all within the firm unless you allow individual changes.
In case you missed it…
- What The F?! A Guide To The F Key Shortcuts in P4W
- The New You: Configuring your P4W Desktop to suit the way you work
More of a video/demo person? Watch No Pane(s) No Gain – How to configure your Case Manager screens video below!
Book a Demo
"*" indicates required fields